
The Billings module handles the money side of your clinic: turning a visit into a bill, taking payment, and understanding your revenue. Most bills start automatically from a consultation, so you rarely build one from scratch.
How a bill is created
When you take a consultation to checkout, EazyClinic builds a bill from everything on the visit — the prescribed medications and the services performed — priced according to the patient's price tier. You review it, take payment, and the bill is created. See the Consultations guide for the checkout step.
Billing statuses
A bill moves through these five statuses. You can set the status manually from the dropdown on the bill, and it also updates automatically as payments are recorded.
| Status | Meaning |
|---|---|
| Draft | Started but not finalised. |
| Pending | Finalised, awaiting payment. |
| Partially Paid | Some payment received; a balance remains. |
| Paid | Fully settled. |
| Void | Cancelled — the bill is no longer valid and isn't counted as revenue. |
Recording a payment
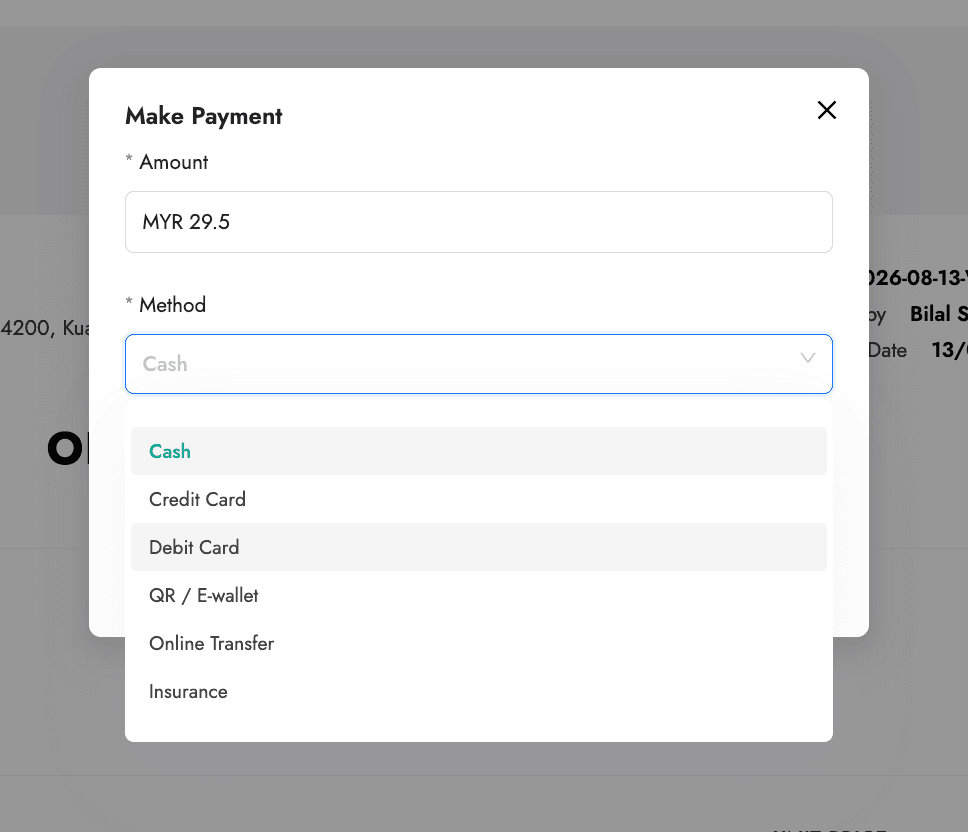
Open a bill and record a payment. Choose the method the patient used:
- Cash
- Debit Card
- Credit Card
- QR / E-Wallet
- Online Transfer
- Insurance
Partial payments
You can record more than one payment against a single bill. If a patient pays part of the total, the bill becomes Partially Paid and tracks the outstanding balance until it's fully settled. This is useful for split payments (for example, part insurance, part cash) or paying an outstanding balance later.
Adding, editing, and cancelling payments
As long as the bill is not yet Paid or Void, you can freely manage its payments:
- Add another payment towards the outstanding balance.
- Edit a payment you've already recorded — for example, to fix the amount or the method.
- Cancel a payment. The payment record is kept but marked cancelled, and its amount is removed from the collected total.
Any of these recalculates the bill's status automatically (Pending → Partially Paid → Paid) based on the total collected.
Once a bill reaches Paid or Void, its payments are locked — you can't add, edit, or cancel them. To make a change after that, first move the bill back to an open status (for example, Pending or Partially Paid) from the status dropdown, adjust the payments, and settle it again.
Printing the bill
Open a bill to view it as an Official Receipt, with its receipt number, your clinic details, and the patient's details. Click Print to print it, or save it as a PDF.
You can choose how much detail the receipt shows:
- Itemized — every medication and service appears as its own line, with the amounts adding up to the total. Use this when the patient (or their insurer/company) needs a full breakdown.
- Non-itemized — the charges are collapsed into a single summary line (labelled "Medical services & medications", or the bill's note if you've added one) showing just the total. Use this for a simpler receipt without the line-by-line detail.
Switch between the two with the itemized toggle before printing.
Finding and filtering bills
The Billings list shows all your bills. Filter them by:
- Status (for example, only unpaid or partially paid bills)
- Payment method
- Date range
Open any bill to see its line items, payments, and the linked consultation and patient.
Revenue reports
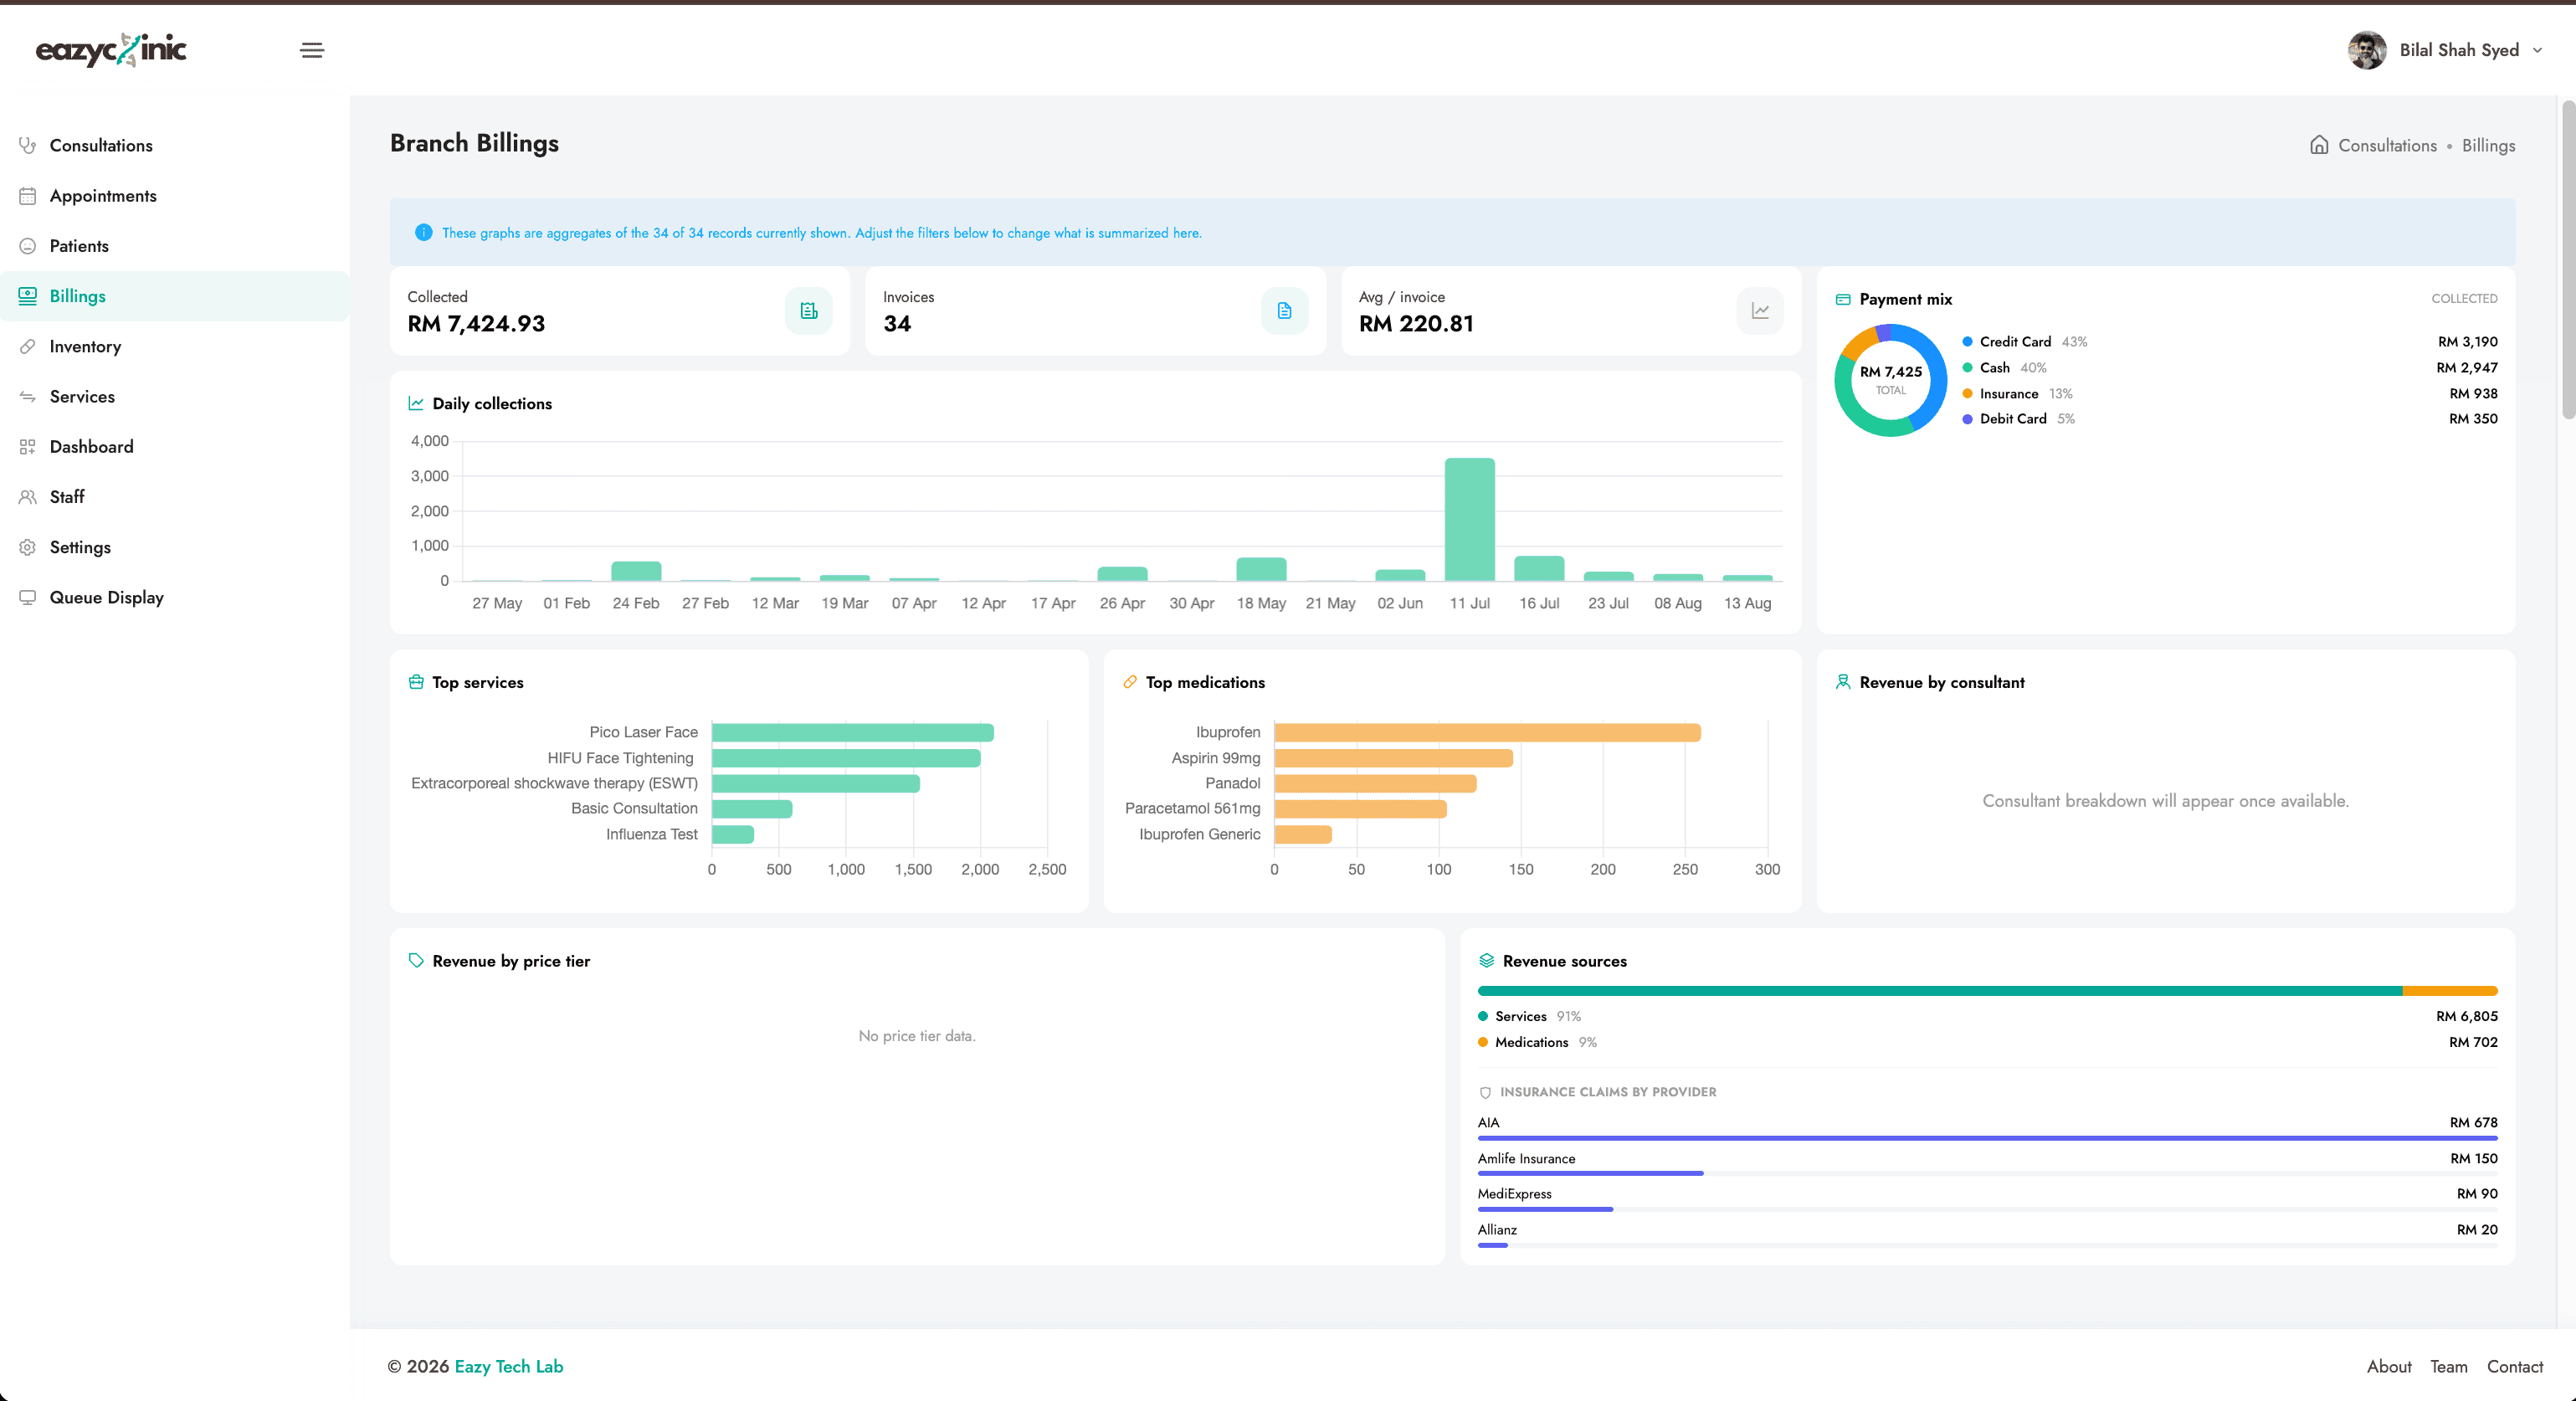
The Billings overview gives you a financial snapshot of your clinic, including:
- Key figures — headline numbers such as collections and outstanding amounts.
- Daily collections — how much you took each day.
- Payment mix — the split across cash, card, e-wallet, transfer, and insurance.
- Revenue by consultant — which practitioners are generating revenue.
- Revenue by price tier — how much comes from each pricing plan or panel.
- Revenue sources and top items — your biggest earners.
For broader clinic analytics, see the Dashboard guide.
Related guides
- Consultations — where bills are created.
- E-Invoicing (LHDN) — issuing a compliant e-invoice for a bill.
- Settings — configuring price tiers and tax profiles.
![[object Object] icon](/_next/static/media/whatsapp-logo.faecda2e.svg)